First of all, we should know what autocorrect is and how it works in Microsoft Word.
What is Autocorrect in Microsoft Word
Autocorrect is a feature that automatically replaces a phrase or character with another phrase, character, word, emoji, etc.
How Autocorrect Works in Word
Autocorrect has a database of what you want to be replaced and what should be replaced. And it can be anything; we will explain it in the following sections.
Fast Access:
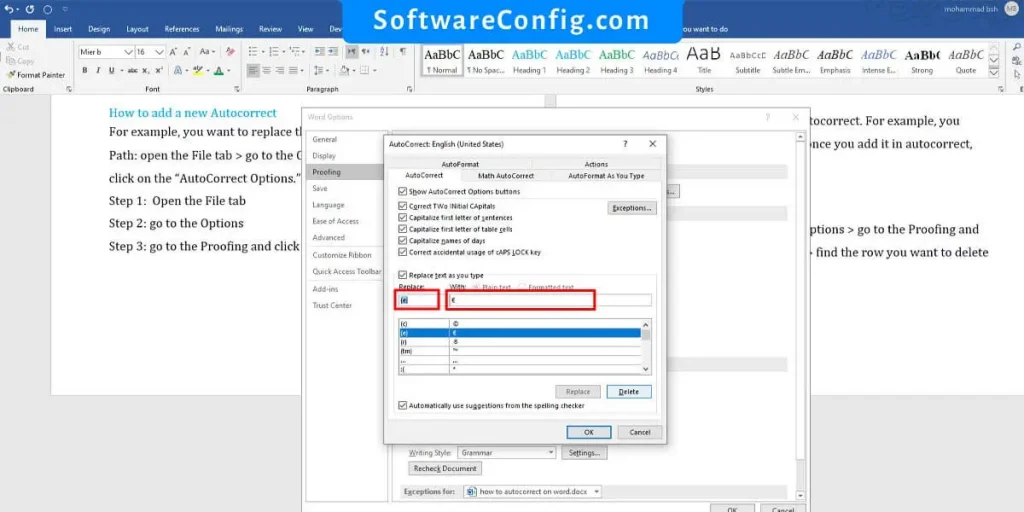
How to add a new Autocorrect
For example, you want to replace the “:0” with the “😮” emoji.
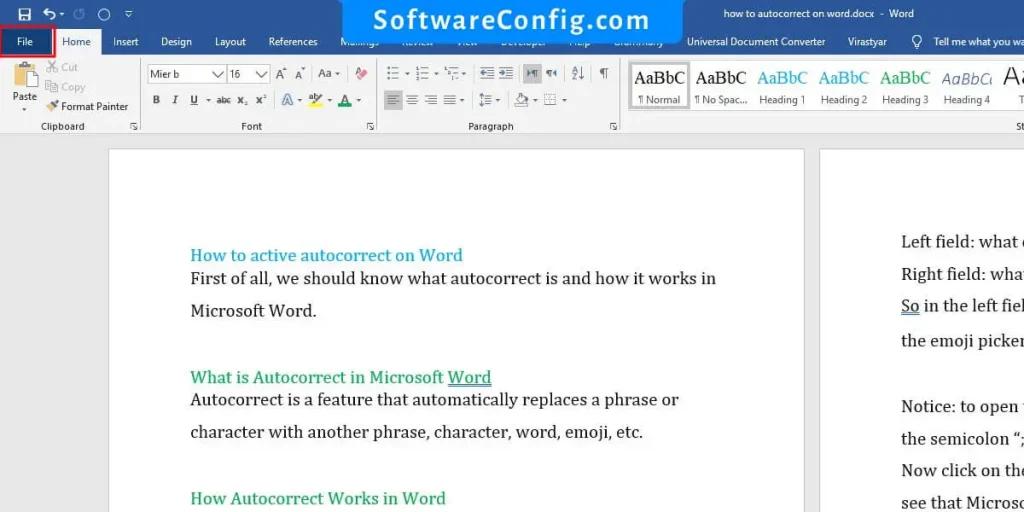
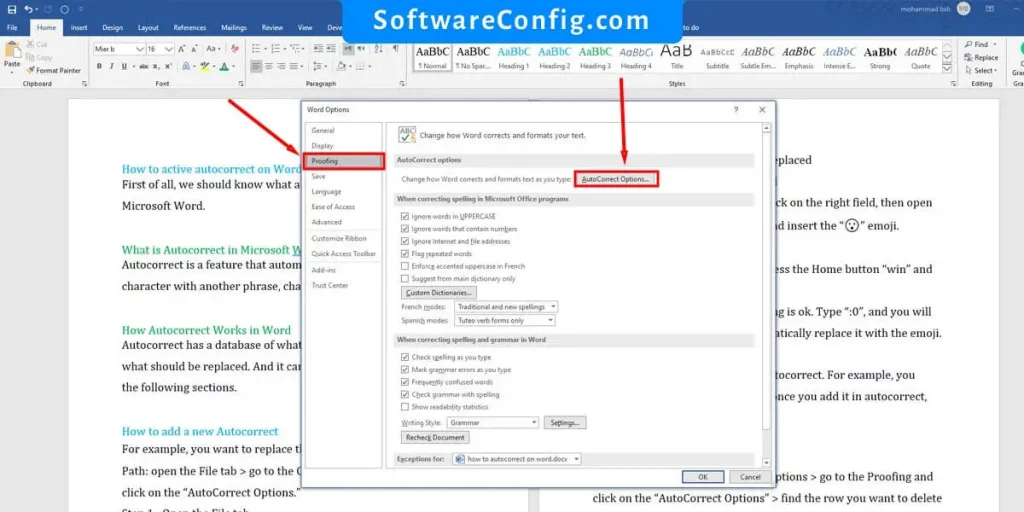
Path: open the File tab > go to the Options > go to the Proofing and click on the “AutoCorrect Options.”
As I mentioned before, there are two fields in the AutoCorrect window :
- Left field: what do you want to be replaced
- Right field: what should be replaced
So in the left field, insert “:0” and click on the right field, then open the emoji picker on your desktop and insert the “😮” emoji.
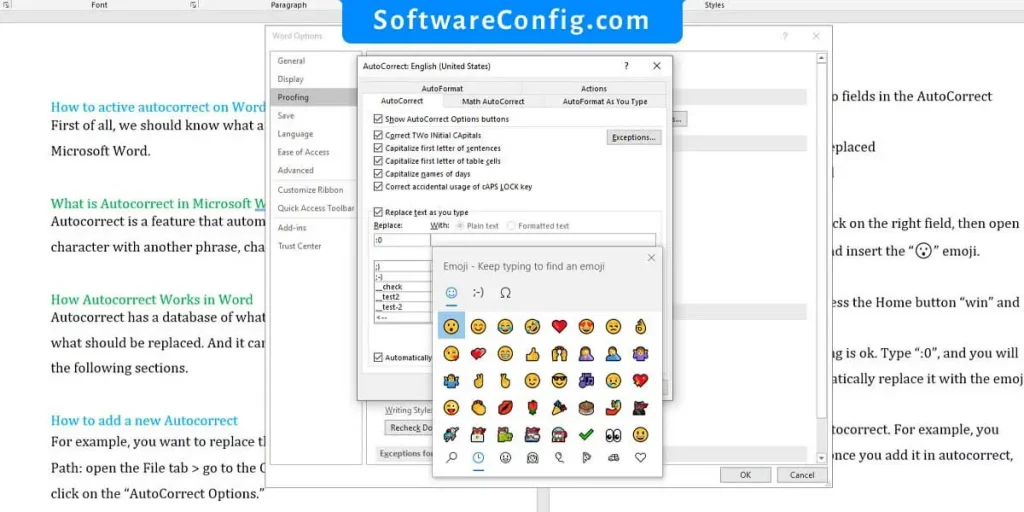
Notice: to open the emoji picker, press the Home button “win” and the semicolon “;” on your keyboard.
Now click on the Add, and everything is ok. Type “:0”, and you will see that Microsoft Word will automatically replace it with the emoji.
You can replace any phrase with autocorrect. For example, you always write something wrong, so once you add it in autocorrect, Microsoft Word always fixes it.
How to remove an Autocorrect
Path: open the File tab > go to the Options > go to the Proofing and click on the “AutoCorrect Options” > find the row you want to delete > click on the delete button
How to edit an Autocorrect
Path: open the File tab > go to the Options > go to the Proofing and click on the “AutoCorrect Options” > find the row you want to edit > edit the field you want and press ok.